How to Grow Garlic
This article is part of our “How to Grow Herbs” series. If you would like to learn more about how to work with herbs after you harvest them, please refer to our Herbal Aromatherapy Certification Program™ here.

Homegrown garlic is truly one of my favorite garden treats. It is so much tastier when it is fresh than it is when I purchase it from the supermarket, and it feels so satisfying and empowering to grow it myself that I find myself recommending it to everyone who is endeavoring to grow more of their own food.
Growth Habit
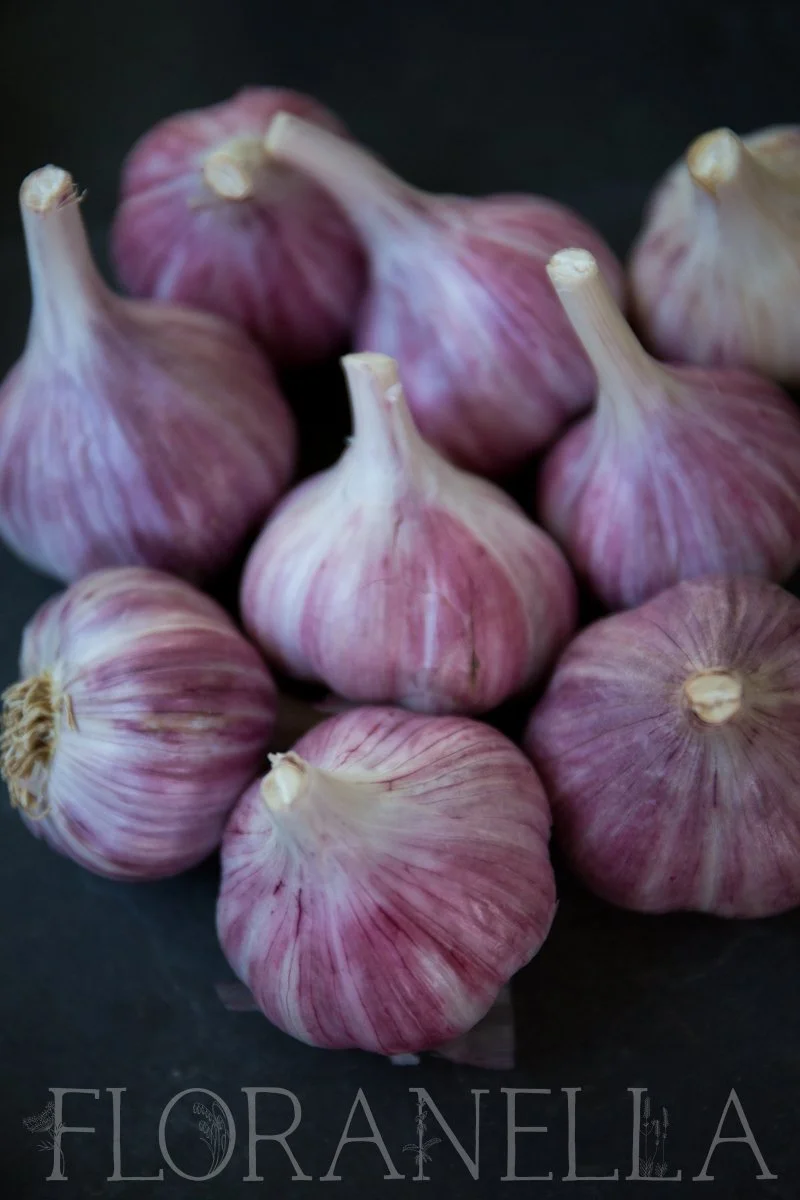
There are two different types of garlic: soft neck varieties and hard neck varieties. The hard neck varieties produce what is called a scape in the spring after they are planted. A scape is an edible, tasty flower spike that emerges from the planted garlic head in the springtime. You can cut these curly scapes off the plants shortly after they emerge, chop them up, and add them to stir fries. They have a garlicky flavor, though it is a bit more subtle than that of the garlic itself. They are also delicious when quick pickled and kept in the fridge.
Hard neck varieties of garlic tend to be hardier than soft neck varieties, and since they are usually planted in the fall, you might find that this is the type you need to grow in your area.
Soft neck varieties do not produce scapes the spring after they are planted. These are the varieties that are a little less hardy – usually down to a USDA growing zone 3, 4 or 5 - and that you may have seen stored tied together in pretty braids.
As garlic grows, it produces an upright stem with leaves that point upward and slightly outward. In ideal conditions and depending on the variety, the plants can grow to be about 3 feet tall, but some may be as short as 12 inches. It is usually ready to harvest right around the beginning of summer. In our area, I tend to harvest somewhere around the fourth of July. You will know the garlic is ready to be harvested when the bottom few sets of leaves have turned yellow and dried out.
Growing from Seed Garlic
Garlic is usually grown from what we call seed garlic. These are essentially just mature garlic heads that are broken up into individual cloves. Each clove becomes the “seed” and is planted between 6 and 8 inches apart (sometimes more), depending on the variety. If your variety produces small heads, you can get away with closer spacing. Keep in mind, though, that you don’t want the foliage of your plants to be too crowded either. If you have room for more generous spacing, try planting 8 to 10 or even 12 inches apart to help ensure good air flow between the plants.
Plant each garlic clove about 2-3 inches deep, making sure that after you press the clove into the soil and cover it, the tip is not visible. It is the pointed part of the clove that needs to face the sky as you plant. The flat part is where the roots of the garlic head were previously located; this needs to be facing the earth as you plant it.

Garlic is typically planted in the fall – September or October is usually recommended. However, if you live in an area with mild winters, warm springs and hot summers, you can probably get away with planting it much later. Several years ago, I forgot to plant my garlic on time and didn’t get it into the ground until late January / early February. It came up quickly, thrived, and produced a generous harvest just as usual and right on time. If you find yourself running late with planting it, try to get it in the ground any way. It won’t keep until the next year, so with garlic, it seems that it is better planted late than not at all. (That said, it is best to plant it before the ground freezes if you live in an area with colder winters. I live in a zone 8b, so our mild winters give me some extra flexibility.)
You can also plant garlic from seeds if you have some extra time (you will not likely get a viable harvest the first year), patience, and are aware that the seed will not necessarily be true to the parent variety. If you want to collect seeds from your garlic plants, allow the scapes to remain on the plants so they will produce flowers and set seeds. Collect the flower heads as they start to dry out and hang them upside down in a brown paper bag to finish drying. Once dry, you can shake the seeds out of the flower heads into the bag to collect them. Some plants make what look like miniature garlic cloves in place of seeds – these can also be planted to grow new garlic plants.

Ideal Conditions
Garlic grows best in full sun and in deep, well-amended soil that gets consistent water but does not get soggy. Good drainage is essential. You do not need to water in the cloves if you plant them in the fall. In spring when you start watering the other things in your garden, begin watering the garlic. Usually, a deep watering once or twice per week is sufficient. Watering to frequently can lead to flavorless garlic.

Harvesting and Curing
Garlic needs to be harvested when the soil is dry. It is best to stop watering the garlic bed at least a week prior to harvesting; two is better. You do not want the heads to be moist when you harvest them or you will risk compromising their shelf stability.
To harvest the garlic, pull up the entire plant. I usually lay mine out in a single layer on a table rack to air dry for a couple of days. At that point, I take a dry rag and use it to brush off any dirt that is clinging to the surface of the bulbs. Once the bulbs look pretty clean, I move the heads into the garage to finish curing.
To cure your garlic, hang it upside down in an area with good air flow for about 2 weeks or until the bulbs are completely dry on the outside and the outer layers of skin have developed a papery feel to them. We like to use a stainless steel shelving unit to hang our garlic, as the stalks can fit perfectly between the wires of the shelves. You could also tie a few bulbs together and hang them upside down in bundles.
You can cut off the stalks after the curing process has been completed or you can cut them off prior to hanging them upside down; whichever works best for you. I prefer to leave the stalks until afterward.
If you have soft neck garlic varieties, you can also braid the stalks of several bulbs together to create an easy-to-hang bundle for storage.
Learning More
If you would like to learn more about how to work with herbs, particularly aromatic plants, I hope you will join me in our Herbal Aromatherapy Certification Program™ here at Floranella! In it, I teach students how to safely and effectively work with over 100 different herbs as well as their applicable essential oils and hydrosols from the garden to the still to the apothecary. I hope to see you in class one day!

About the Author
Hi there, I’m Erin! I am the main instructor here at Floranella. I am a clinical herbalist, aromatherapist, artisan distiller and organic gardener based in the Pacific Northwest. Here at Floranella, I teach people how to work with plants safely and effectively from the garden to the apothecary. Thanks for being here! I’m glad you stopped by.
